
Steps
1. Open the Pricing Plans page
Go to the Billing page and click Change Plan on the Current Plan card. This opens the CrewBox Plans page.
2. Set your crew size
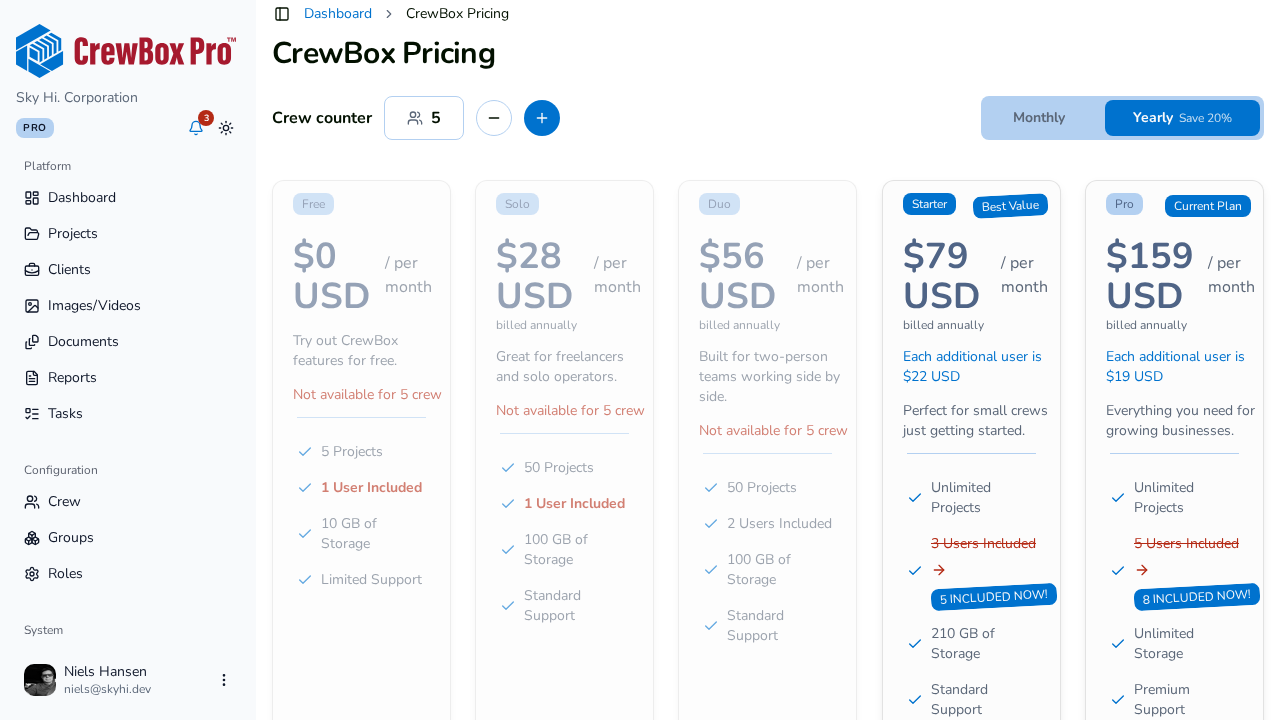
Use the crew-size stepper (1–999) to enter how many people you need. Prices recalculate for your crew size — each card shows the computed price (base price plus additional-seat cost) as you adjust.
3. Choose a billing cycle
Toggle between Monthly and Yearly. Yearly is highlighted with its savings label.
4. Compare the plan cards
Five plans are available — Free, Solo, Duo, Starter, and Pro. Each card shows the price for your crew size, a billing note, the additional-user cost, a tagline, and a feature list covering projects, users, storage, and support level. Look for the badges:
- Current Plan — the plan you're on now.
- Best Value — the recommended pick.
- Not Available — the plan can't fit the crew size you entered (for example, its seat limit is too low).
5. Choose your plan
Click Choose Plan on the card you want. The change applies immediately and a confirmation toast appears. Back on the Billing page, the Current Plan and Seat Usage cards reflect the new plan.