A homeowner says the siding was already scratched. A property manager questions whether the old water damage was really there. The final invoice is waiting, but the crew's photos are spread across five phones. Before and after renovation photos turn those arguments into a record: what the site looked like when you arrived, what your crew found, and what you completed.
The photos themselves are not the system. A random camera roll full of unmarked images will not help much when a claim comes in six months later. Good documentation connects each image to a job, location, date, task, and clear explanation. That is how routine jobsite photos become proof of workmanship.
Why Before and After Renovation Photos Matter
A clean after photo sells the result. It can help a homeowner see the value of a new roof, finished bathroom, repaired drainage system, or upgraded panel. But the before photo carries just as much weight. It establishes the starting condition, including pre-existing defects, hidden damage, access limitations, and site conditions that may affect the scope.
Together, the two sets create a visual chain of custody for the work. They support change orders, progress billing, warranty conversations, insurance claims, punch-list closeout, and disputes over damage. They also keep the office from calling the field for photos that were already taken but never labeled or uploaded.
For owners, that means fewer gray areas. For project managers, it means faster status checks without driving to every site. For crews, it means less time explaining work they already completed.
Capture the Before Condition Before Tools Come Out
The first photos should happen at arrival, before demolition starts, materials are staged, or the work area is disturbed. Once the jobsite changes, the cleanest proof of pre-existing conditions is gone.
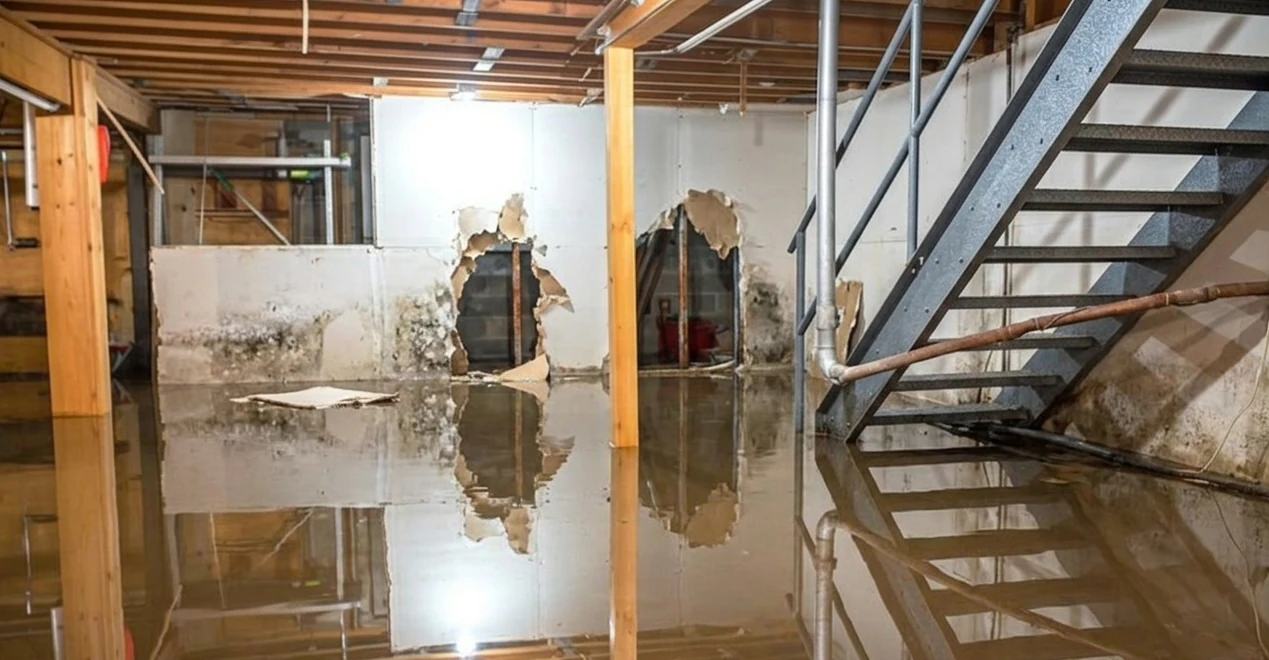
Start wide. Photograph the full elevation, room, mechanical area, landscape zone, or affected section so the issue has context. Then move closer to document the details: cracked siding, stained drywall, failed flashing, corroded fittings, uneven grading, broken tile, or existing damage around the work zone.
Include identifying reference points in a few shots. A street number, unit number, room marker, equipment label, or recognizable exterior feature helps establish exactly where the photo was taken. Do not rely on memory or an unmarked close-up of a stain, crack, or dent.
If the work involves a condition that may lead to a scope change, document it from more than one angle and add a short note immediately. "Rotten sheathing found behind north gable siding" is useful. "Damage" is not. The note should identify the location, condition, and next action, such as waiting for approval or sending a change order.
Build a Repeatable Photo Standard
Every trade needs its own details, but the field standard can stay simple: capture context, condition, progress, and completion. Crews work faster when they know what "enough photos" looks like before they start.
For most renovation jobs, capture these four groups:
- Arrival and pre-existing condition: Overall site views, access conditions, customer property near the work area, and visible damage present before work begins.
- Hidden work and milestones: Open walls, flashing layers, pipe runs, wiring paths, substrate repairs, waterproofing, structural corrections, and any inspection-sensitive work that will later be covered.
- Issue and change documentation: Unexpected conditions, customer-requested changes, material substitutions, weather impacts, and work stoppages with a clear note.
- Final completion and cleanup: Wide finished views, close-ups of workmanship, restored work areas, removed debris, and any remaining punch-list items.
The goal is not to photograph every nail, fitting, or screw. Too many useless photos create the same problem as too few. Capture the items that prove the condition, method, and result. On a roof, that may mean decking repairs, ice and water shield, flashing, penetrations, and final elevations. On a plumbing renovation, it may mean existing leaks, opened-wall conditions, new piping routes, pressure-test evidence, and restored surfaces.
Make Each Photo Defensible
A photo is more credible when its job details are captured at the source. The field crew should not need to text images to a supervisor, then hope someone remembers which project they belong to. That workflow loses context fast.
Assign photos to the correct project while standing on site. Use automatic timestamps and GPS data where appropriate, then add a direct label or annotation when the image needs explanation. Circle a damaged section. Point to a failed fitting. Mark the area where a repair was completed. A customer, adjuster, or attorney should be able to understand the photo without calling the technician who took it.
Keep original records intact. Edited screenshots, images forwarded through text chains, and photos saved with vague names can raise questions about timing and authenticity. Good annotation tools mark up a separate layer and never alter the original file, so you can add a copy with callouts to a report while the untouched, time-stamped shot stays with the project file.
Photo quality matters, but field speed matters too. A modern phone camera is usually enough if the lens is clean, the image is in focus, and the crew takes a second shot when glare, shadows, or distance hide the condition. Do not turn documentation into a photo shoot. Build a short, consistent routine that crews can complete in minutes.
Use Notes That Answer the Next Question
A strong note handles the questions that always follow a photo: Where is this? What are we seeing? Why does it matter? What happened next?
For example, "Existing water staining at ceiling below second-floor bath, documented before demolition" gives a manager and homeowner useful context. "Installed new step flashing at chimney, west slope, after removing failed existing flashing" ties the completed work to a specific location and method.
When an issue needs attention, use the note to create accountability. Identify who owns the next step and whether work can proceed. A photo of missing material is evidence. A photo tied to an assigned task is evidence plus action.
Organize Photos Around the Job, Not the Phone
The biggest documentation failure is not that crews fail to take photos. It is that nobody can find the right photo when it matters. Camera rolls, personal text threads, and unnamed cloud folders are not job records.
Organize each file under the project and divide records by phase, area, trade, or task. The exact setup depends on your workflow. A small exterior contractor may use arrival, tear-off, repairs, install, and completion. A larger renovation crew may separate demolition, framing, rough-in, inspection, finishes, and closeout.
The office needs a live view of what happened without digging through hundreds of images. The field needs a workflow that works with gloves on, in bad weather, and on jobsites with weak service. That is why mobile-first systems matter. CrewBox Pro, for example, lets crews capture GPS-tagged, timestamped photos, annotate issues, and organize records at the point of work, even when the jobsite is offline.
The tool is secondary to the discipline. Set the expectation that photos are part of completing the task, not an optional extra at the end of the day. If the crew cannot document the repair, the repair is not fully closed out.
Turn Photo Records Into Faster Approvals and Fewer Disputes
Before and after images are most valuable when they leave the job file in a format people can use. A homeowner may not need every progress photo, but they do need a clear set of finished images and any relevant explanation of changes. An insurer may need date-stamped condition photos, annotated damage, and proof of corrective work. A manager may need all of it.
Create different views from the same record instead of rebuilding the story each time. A client-ready report can show the starting condition, approved scope, key work stages, final result, and any open item. Keep the full project record behind it for warranty support, internal review, and liability protection.
Be careful not to oversell what photos prove. Images can show visible conditions and completed work, but they do not replace permits, inspection records, signed approvals, test results, or properly written change orders. They strengthen those documents by showing the physical reality behind them.
Common Gaps That Undercut Good Work
The most expensive gaps are usually small. Crews take final photos but skip the pre-existing damage. They document a problem but do not record where it was found. They photograph a repair before it is covered, but the image is buried in a technician's phone. Or they send great images to a customer without retaining a complete internal record.
Fix the process at the start of the job. Add photo requirements to the kickoff checklist. Make milestone photos part of task completion. Review the record before billing and before closing out the project. When a manager sees a missing before image while the crew is still on site, it is easy to correct. Two weeks later, it may be impossible.
The best before and after renovation photos do more than make a project look good. They show the condition you inherited, the decisions made in the field, and the work your crew delivered. Take them while the facts are in front of you. Organize them before the next job starts. When the question comes later, your record should already have the answer.
Why CrewBox Pro Is Built for This
Before and after documentation only works when capture, annotation, and organization happen in one place, in the field, without extra office steps. That is exactly what CrewBox Pro is built to do. Every photo is timestamped, GPS-tagged, attributed to the crew member who took it, and filed to the right project automatically, so the context is set at the source instead of reconstructed later.
Crews mark up issues on a non-destructive layer that never touches the original file, keep documenting when the jobsite has no signal, and let everything sync once service returns. When it is time to close out, the same records turn into client-ready reports showing the starting condition, key stages, and finished result. No five-phones-full-of-photos scramble, and no gaps in the record when a claim shows up months later.
See how the plans compare and pick the one that fits your crew on the CrewBox Pro pricing page.
Start Your Jobsite Record Today
Every renovation your crew completes without a system is a job with gaps in the record. Sign up for CrewBox Pro and your crew can be documenting the next jobsite from their phones the same day - no training sessions, no new office workflow, no forms to design. Create the account, add your projects, and start capturing before the first tool comes out.