A hailstorm can turn a clean roof inspection into a disputed claim fast. Roofing hail damage documentation is what separates a contractor's informed assessment from a folder of loose photos that an adjuster, homeowner, or attorney can pick apart. If the proof is not tied to the property, the date, the location on the roof, and the condition observed, it leaves room for doubt.
The work starts before the estimate is written. Crews need a repeatable field process that captures storm evidence quickly, keeps it organized by job, and shows exactly what was found without forcing someone in the office to reconstruct the story days later.
Why roofing hail damage documentation gets challenged
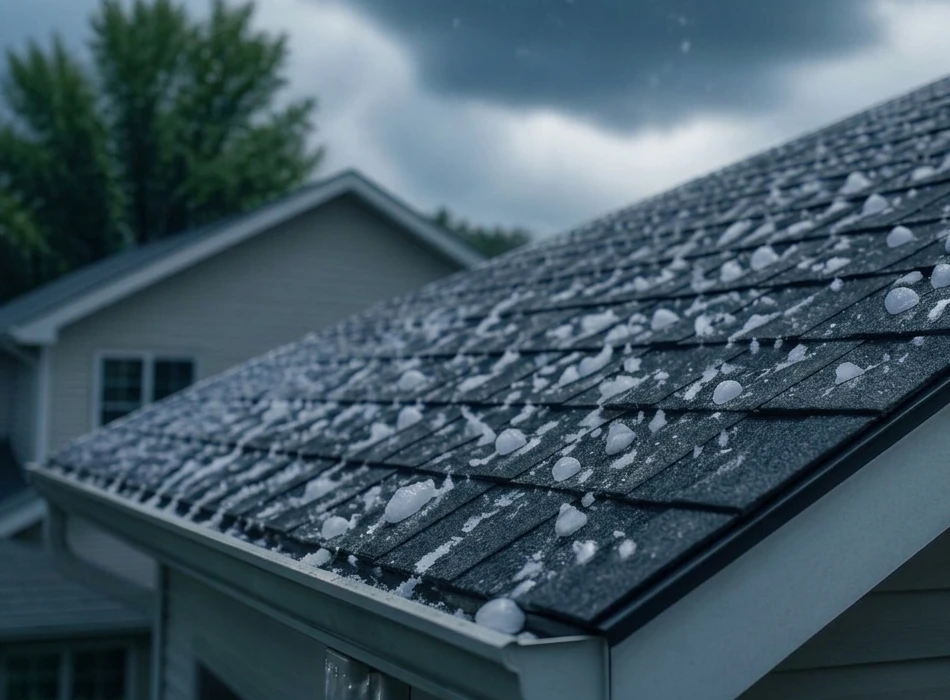
Hail damage is rarely as obvious as a missing shingle. A legitimate impact may show as a bruise in the asphalt mat, displaced granules, cracked surfacing, damage to metal accessories, or fractured skylight components. From the ground, those details can be hard to see. From an insurer's desk, they are even harder to verify if the record is incomplete.
The dispute usually is not just about whether hail fell in the area. It is about whether the roof was damaged, how much damage exists, whether it matches the reported storm date, and whether wear, installation defects, foot traffic, or prior conditions could explain the same marks.
A single wide roof photo may help establish context, but it will not prove a hail strike. Ten close-up photos with no location or date may show damage, but they can be challenged as photos from another roof or another day. The defensible record connects the wide view, the roof slope, the material, the close-up impact, and the inspection date in one clear chain.
That chain protects more than the claim. It protects the contractor when a homeowner says damage was missed, a carrier questions the scope, or final payment stalls over work that was approved in conversation but never documented.
Build the record at the roofline
Good documentation does not mean taking hundreds of random photos. It means capturing the right evidence in the order someone else needs to review it. A field tech should be able to follow the same sequence on every hail inspection, whether it is a single-story asphalt roof or a large commercial low-slope system.
Start with property and storm context
Capture the address, date, time, weather conditions, and the people present. Photograph the front of the property and visible address numbers when possible. If the homeowner identifies a specific storm date, log it as reported information, not as a fact you independently verified.
Document the roof type, approximate age if known, number of layers, and any pre-existing conditions. Granule loss in valleys, blistering, rust, algae, exposed fasteners, brittle shingles, and old repairs all matter. They are not part of a hail claim, but leaving them out creates a record that looks selective.
For commercial jobs, note the membrane type, drainage condition, roof-mounted equipment, and areas where ponding may affect the material. Hail can damage many systems differently. The documentation should match the roof you are inspecting, not a generic residential checklist.
Photograph wide, then tight
Work from context to detail. Start with wide photos of each roof elevation. Then document ridges, valleys, penetrations, gutters, downspouts, soft metals, vents, window screens, air-conditioning fins, and other collateral surfaces. These support the storm narrative, but they are not automatic proof of functional roof damage.
Then move to close-ups of each suspected impact. Keep a scale reference in frame where appropriate. Chalk circles can help identify impacts, but use them carefully. Marking every possible spot can make a roof look worse than it is and invite unnecessary questions later. If you use test squares, record their location and dimensions.
Close-up photos need to be sharp, well lit, and taken straight on. A blurry image from six feet away is not evidence. If the shingle mat is fractured or the impact is soft to the touch, capture a photo and add a concise note describing what was observed. Do not overstate what the image cannot show.
Label every slope and finding
"Damage on roof" is not a usable field note. "North-facing rear slope, three suspected impacts with mat fracture" gives an estimator, adjuster, and property owner something they can locate and discuss.
Use a consistent naming method for slopes. Front, rear, left, and right can work on simple homes, but cardinal directions are stronger when the orientation is confirmed. On complex roofs, use a roof diagram or annotated overview so every photo can be traced back to a marked area.
Photo annotations are useful for pointing out an impact, creased shingle, damaged vent cap, or dented gutter. Use them to clarify, not to manufacture. A simple arrow and a short label are usually enough. Heavy markup can hide the condition you are trying to prove.
What a field crew should capture before leaving
The right inspection record includes more than hail strikes. It should show the roof condition, the inspection path, and any safety or access issue that affected the review. Before the crew climbs down, verify that the job file contains these distinct pieces of evidence:
- Property exterior and address confirmation
- Wide photos of every inspected slope or roof section
- Close-ups of suspected hail impacts with location notes
- Collateral damage to metal, vents, gutters, screens, or accessories
- Pre-existing wear, repairs, or non-storm conditions
- Test-square counts, measurements, and inspection notes
- Photos of completed temporary repairs or mitigation work, if performed
If access was limited by steep pitch, wet surfaces, locked gates, dogs, or unsafe conditions, document that too. A clear record of what was not inspected is better than a silent gap. It shows professionalism and offers a path forward, such as a return inspection when conditions are safe.
Protect the chain of evidence
Documentation loses force when photos move through personal phones, text threads, and folders with no job structure. Files get renamed, dates become unclear, and the office spends hours asking which property a photo belongs to and whether it was edited or disconnected from the original inspection.
Use a system that preserves original capture time, organizes photos by project, and keeps inspection notes with the related images. GPS-tagged records add location context where available, while timestamped captures help establish sequence. Neither one alone proves the claim, but together they make the record far harder to challenge.
Offline capability matters because roofing happens where service is weak, crews are moving fast, and the next inspection is already waiting. The field workflow should let the crew capture everything on the roof, then sync it into the project record when connectivity returns. Delayed documentation is where details get forgotten and evidence gets lost.
CrewBox Pro is built around that jobsite reality: capture the photos, assign follow-up, and keep the original field record organized for the office and the client.
Turn inspection proof into a clear report
Homeowners do not need a dump of 187 images. Adjusters do not need one either. They need a clear, accurate PDF report that makes the findings easy to follow.
A strong report opens with property details, inspection date, roof system, and stated storm information. It then moves through roof sections with labeled overview photos, close-up findings, notes on test areas, and collateral observations. Include wear and pre-existing conditions in the same professional tone as the damage findings. That balance builds credibility.
Keep inspection findings separate from repair recommendations and estimates. The inspection report answers, "What did we observe?" The estimate answers, "What work are we proposing and what will it cost?" Combining them carelessly can make the inspection read like a sales claim.
For a repair or replacement that follows, create a second documentation set: materials on site, protection measures, tear-off conditions if relevant, hidden damage found during work, completed flashing and penetrations, and final condition. This is the record that supports workmanship, change orders, warranty conversations, and final payment.
Avoid the mistakes that weaken a claim
The biggest mistake is waiting. Hail evidence changes. Granules wash away, temporary repairs cover the affected area, new storms muddy the timeline, and homeowners may make their own repairs before a contractor returns.
The next mistake is documenting only what supports the desired outcome. A record that ignores age, wear, old repairs, or inconclusive areas does not look thorough. It looks like advocacy. Report what is there, including uncertainty.
Finally, do not rely on verbal handoffs. If a crew lead found three damaged slopes but the estimator only sees one photo later, the estimate will be weak before it ever reaches the carrier. Capture findings at the point of work, assign tasks while on site, and make the job file the single source of truth.
A hail claim may be decided weeks after the storm, by someone who never stood on the roof. Give that person a field record they can follow without guessing. The roof will not speak for itself. Your documentation has to do the talking.
Why crews use CrewBox for hail documentation
CrewBox Pro keeps the whole chain intact from the roofline to the office. Crews capture GPS and timestamps in the field, tag and annotate suspected impacts, assign follow-ups on site, and let everything sync into the right project when connectivity returns. When the inspection is done, the same organized field record turns into a clean, labeled PDF report an adjuster or homeowner can trust — without anyone reconstructing the story days later.
See CrewBox pricing and sign up to build defensible hail documentation on your next storm job.