
Steps
1. Open the Clients page
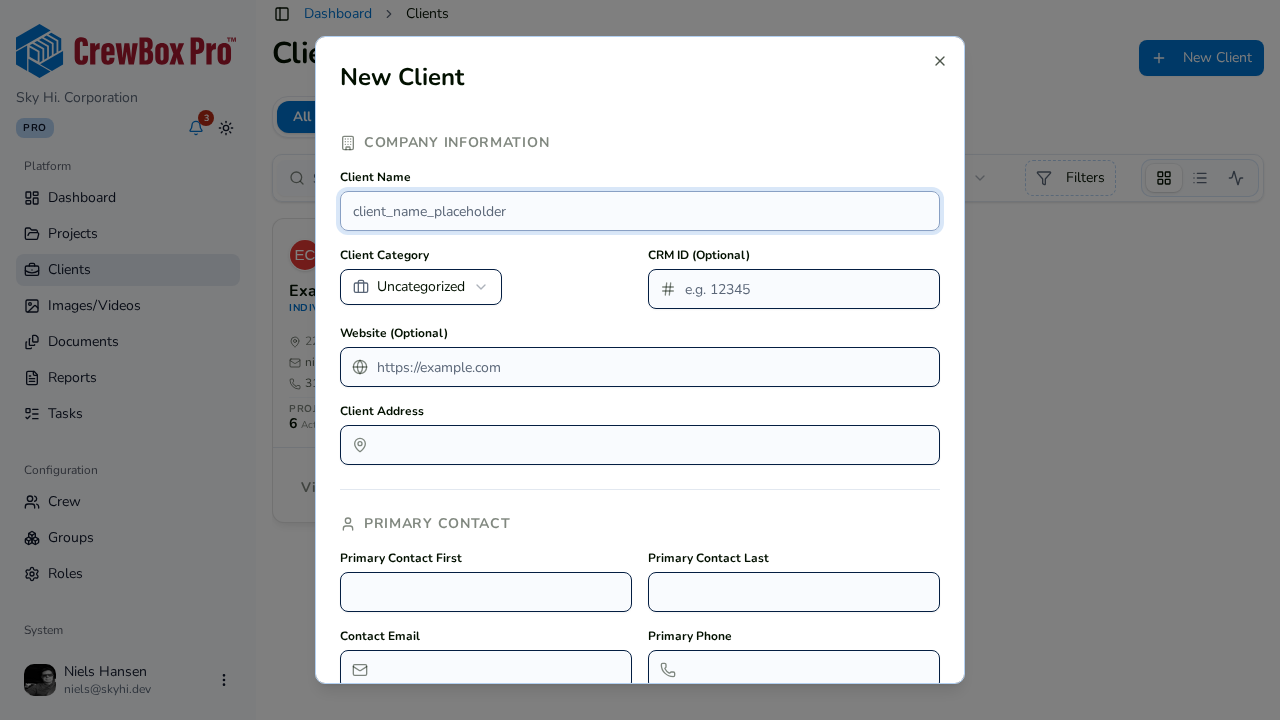
Go to the Clients page from the sidebar and click New Client to open the client modal.
2. Fill in company information
Enter the client's business details:
- Name (required)
- Category (required) — pick from your Client Categories, such as Government or Commercial.
- CRM ID — optional reference to your external CRM.
- Website — optional.
- Address (required) — this powers the Google Maps link on the client's card.
If the category you need doesn't exist yet, add it first on the Client Categories page.
3. Add the primary contact
Fill in the primary contact — all four fields are required:
- First name
- Last name
- Phone
4. Save the client
Save the modal. The client appears in the list with an avatar colored by its category, and shows in the Recent tab for its first 30 days.
5. Put the client to work
From the client's card menu you can Assign Projects, Call Client, Email Client, or open the address in Google Maps. Open the client's detail page to add notes and review its projects.