
Open the New Project Modal
- Go to the Projects page.
- Click New Project (on a brand-new workspace, the empty state offers Create First Project instead).
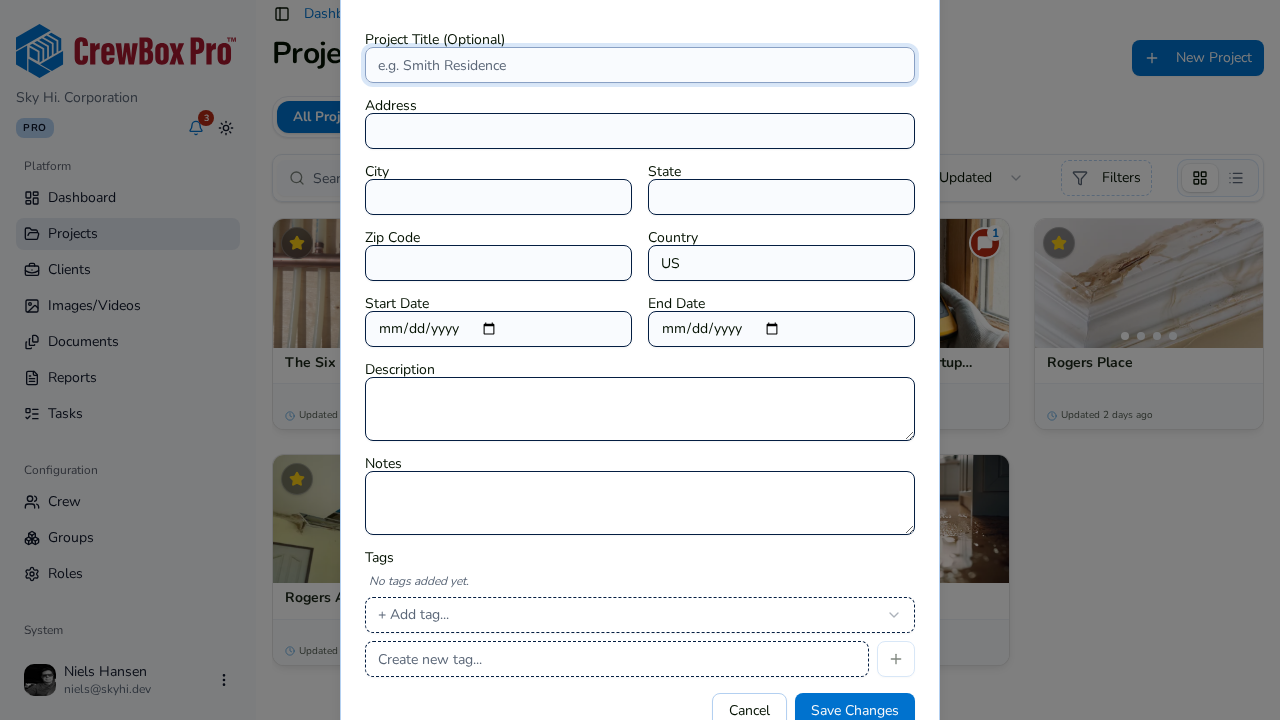
Fill In the Essentials
- Title (optional) — if you leave it blank, the address stands in as the project's name.
- Address (required) — start typing the job-site address. After a few characters, address autocomplete suggests verified US and Canadian addresses; pick one and CrewBox fills the street, City, State/Province, Zip/Postal code, and Country for you — and pins the project's GPS coordinates. Every field stays manually editable, and the labels adapt between US (State / ZIP) and Canadian (Province / Postal code) conventions.
- Start date and End date — set the job's schedule (optional).
- Description and Notes — add context for the crew (optional).
- Tags — toggle existing tags or create new ones inline to keep the portfolio organized.
- Save the project.
Your new project appears at the top of the list (the default sort is Last Updated), ready for photos, documents, and tasks.
Next Steps
- Assign your crew from the project sidebar so the job shows up in their My Projects tab.
- Link a client from the project's actions menu.