
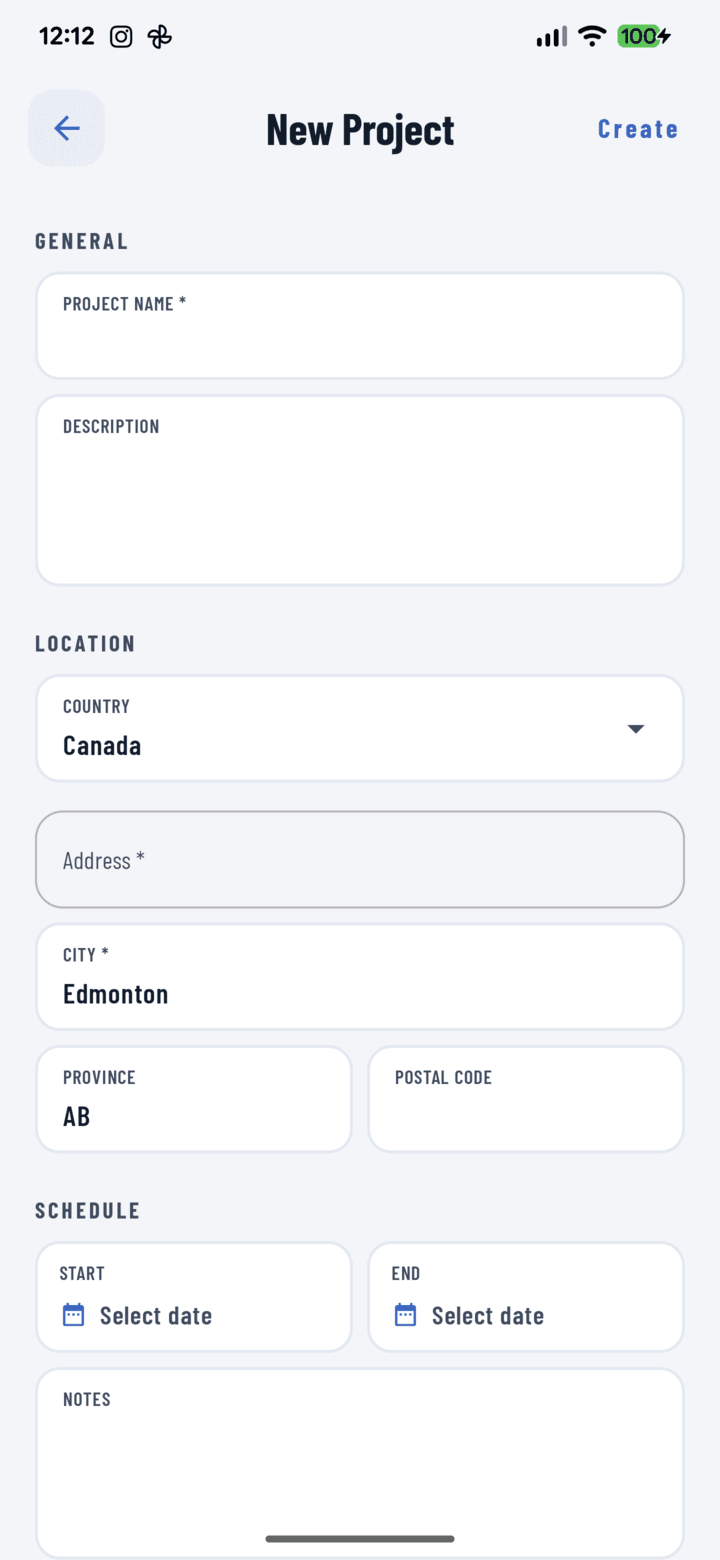
The New Project form
Steps
- Go to the Projects tab and tap the + floating button.
- General: enter the project name (required) and an optional description.
- Location:
• Pick the country (United States or Canada — the form's labels adapt automatically).
• Start typing the address — verified suggestions appear as you type; tap one and the street, city, state/province, and ZIP/postal code fill themselves in.
• City is required; adjust any field manually if needed. - Schedule (optional): pick start and end dates and add notes.
- Tap Save (top bar or bottom button). Validation errors, if any, appear under the fields.
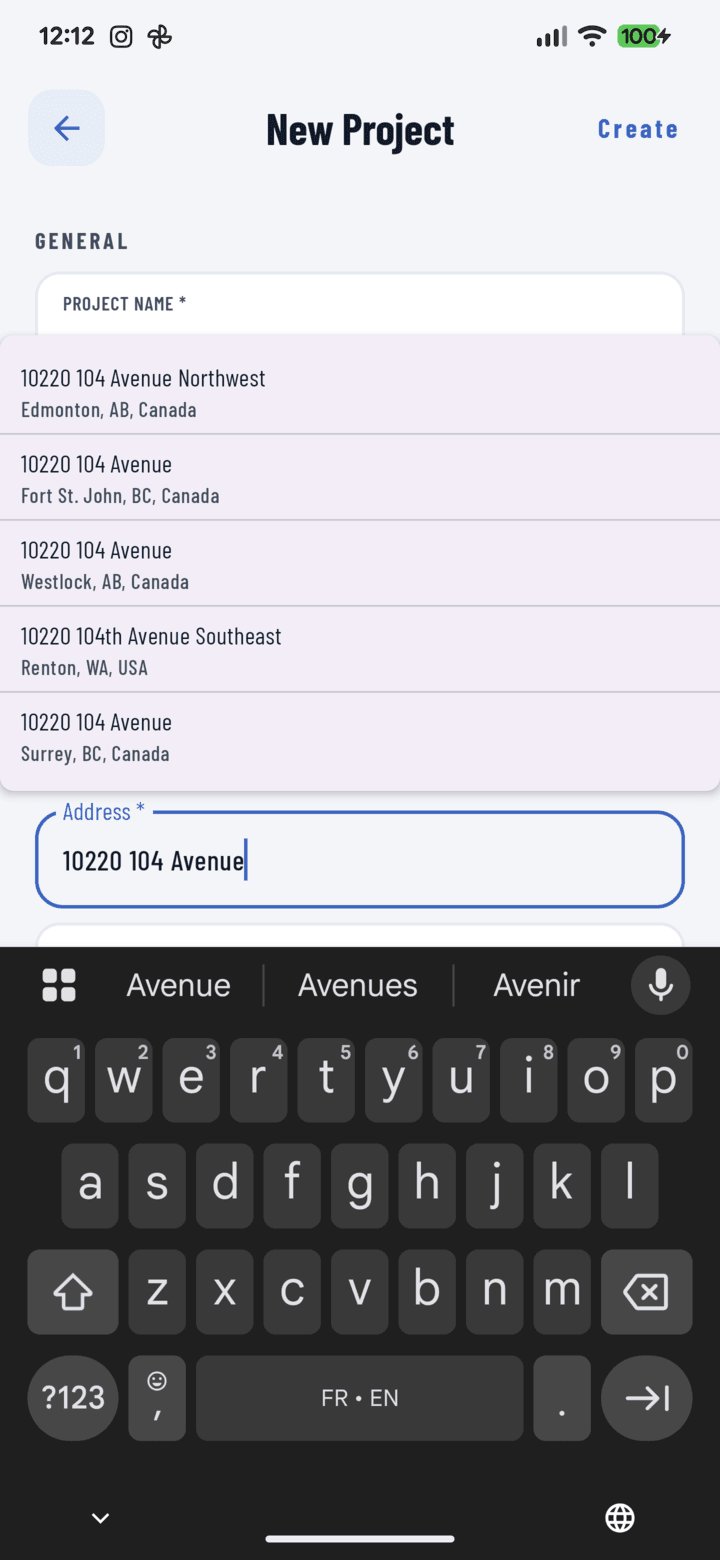
Address autocomplete suggestions
Working Offline
No signal? Save anyway. The project is stored on your device with a "saved offline" confirmation, and CrewBox syncs it to the server automatically when connectivity returns — along with any photos you capture for it in the meantime. Track sync status on the Upload Queue screen.
Tips
- Set your usual country, city, and state in Profile → Default Settings → Project location defaults so new projects pre-fill them.
- After creating the project, open its Details sheet to add tags and assign your crew — see Assign crew to a project.