
Set the Cover
- Open the project and go to its Photos tab.
- Find the photo you want as the cover and open its actions menu.
- Click Set as project cover.
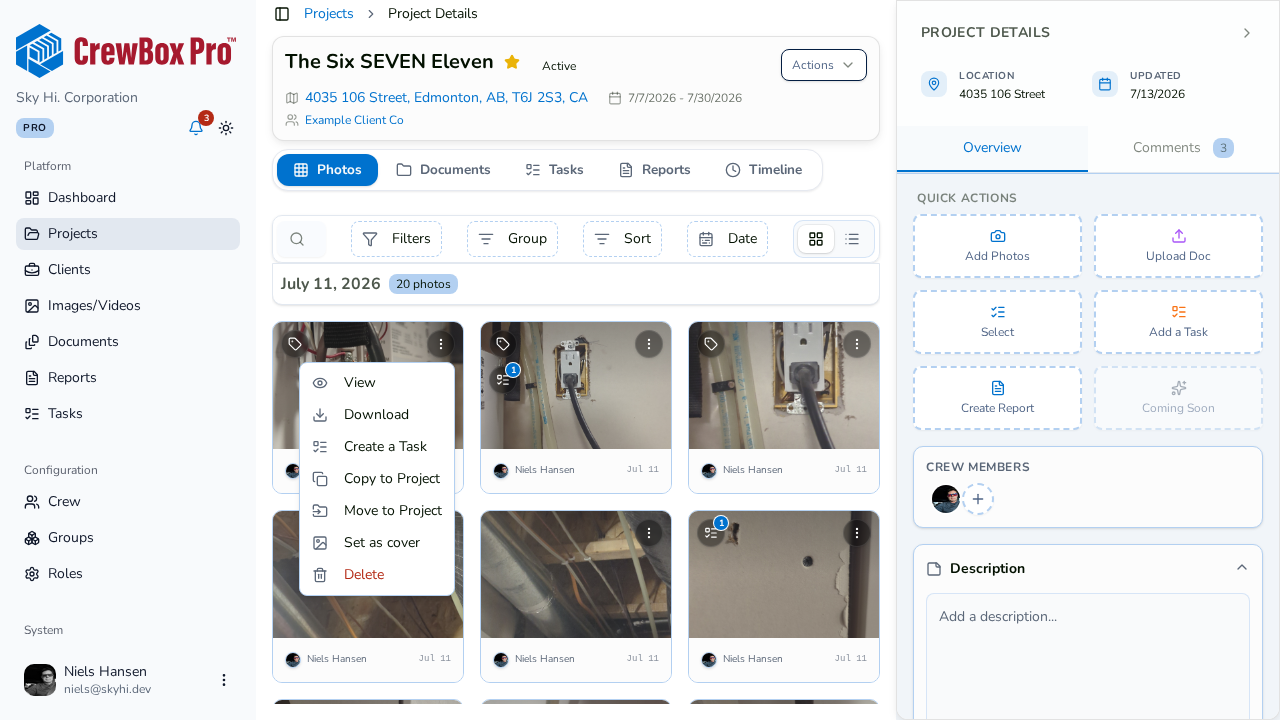
That photo becomes the project's cover image.
Where the Cover Appears
- Project cards — the card's photo carousel on the Projects page shows the cover first; without one, the card auto-advances through recent photos instead.
- Dashboard — the Recently active list in the Project Pipeline uses the cover as the project's thumbnail; without one, it falls back to the project's newest photo.
- List views — the project's thumbnail column reflects the cover.
Tips
- Pick a wide, well-lit shot that reads clearly at small sizes — the dashboard thumbnail is only 75×75 pixels.
- You can change the cover any time by repeating the steps on a different photo.