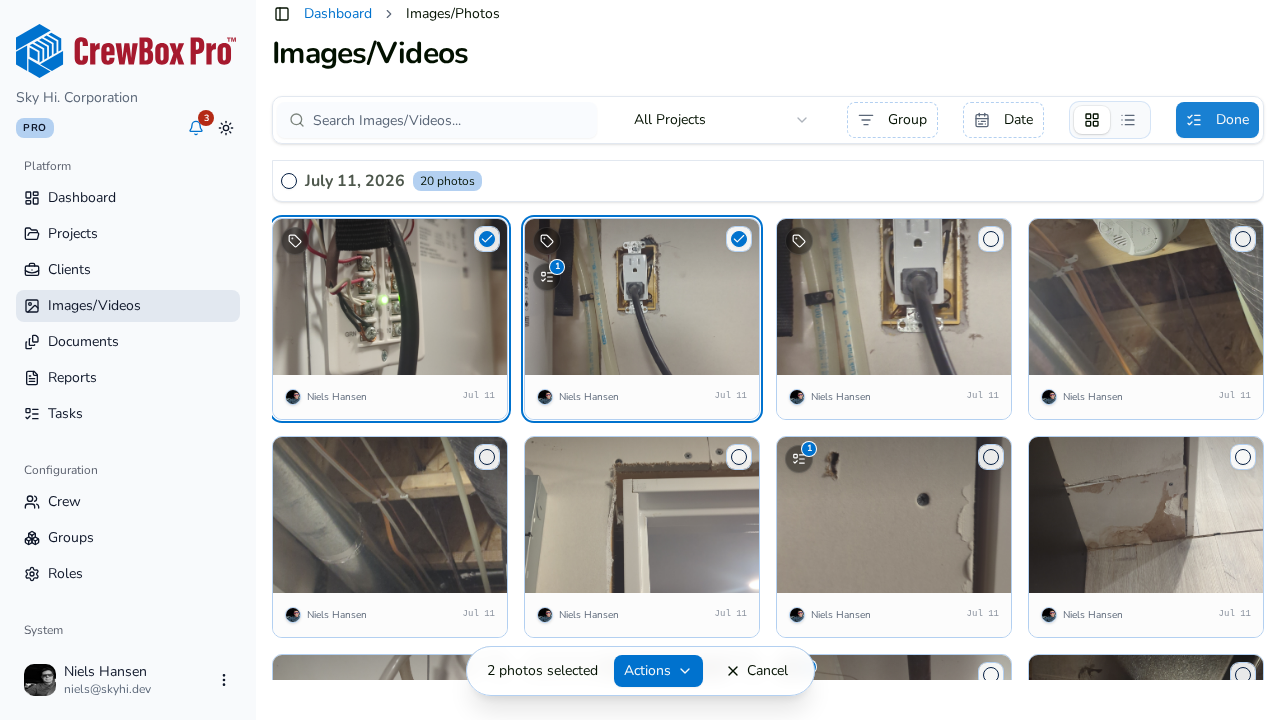
Steps
1. Enter Select mode
Click Select in the Photos tab toolbar, or use the Select quick action in the project sidebar. Checkboxes appear on every item in the grid.
2. Build your selection
Check items one by one, or use the whole-group select toggles on each date/tag/uploader section header to grab an entire group at once.
3. Open the Actions menu
A floating action bar appears with the selection count and an Actions menu containing every bulk action:
| Action | What it does |
|---|---|
| Share | Native browser share sheet (falls back to download) |
| Save to Device | Downloads the selected files |
| Tag | Applies tags to every selected item |
| Move to Project | Transfers the selection to another project |
| Add to Report | Starts a new report with the photos, or appends a new section to an existing one |
| Opens a print view of the selected images | |
| Assign to Task | Links the selection to an existing task |
| Create New Task | Opens task creation with the media pre-attached |
| Delete | Removes the selection after a confirmation |
4. Exit when done
Press Escape (or click Done) to cancel selection mode.
Tips
- Filters compose with selection — narrow with search, tags, or a date range first, then bulk-act on exactly the filtered set.
- Multi-select also works on the cross-project Images page.