
Steps
- Open the report in the editor → Sections tab → tap the section currently holding the photo.
- Find the photo in the section's photo list.
- Open the photo's overflow menu and tap Move to Section.
- Pick the destination section — the photo (with any caption overrides you've set) transfers.
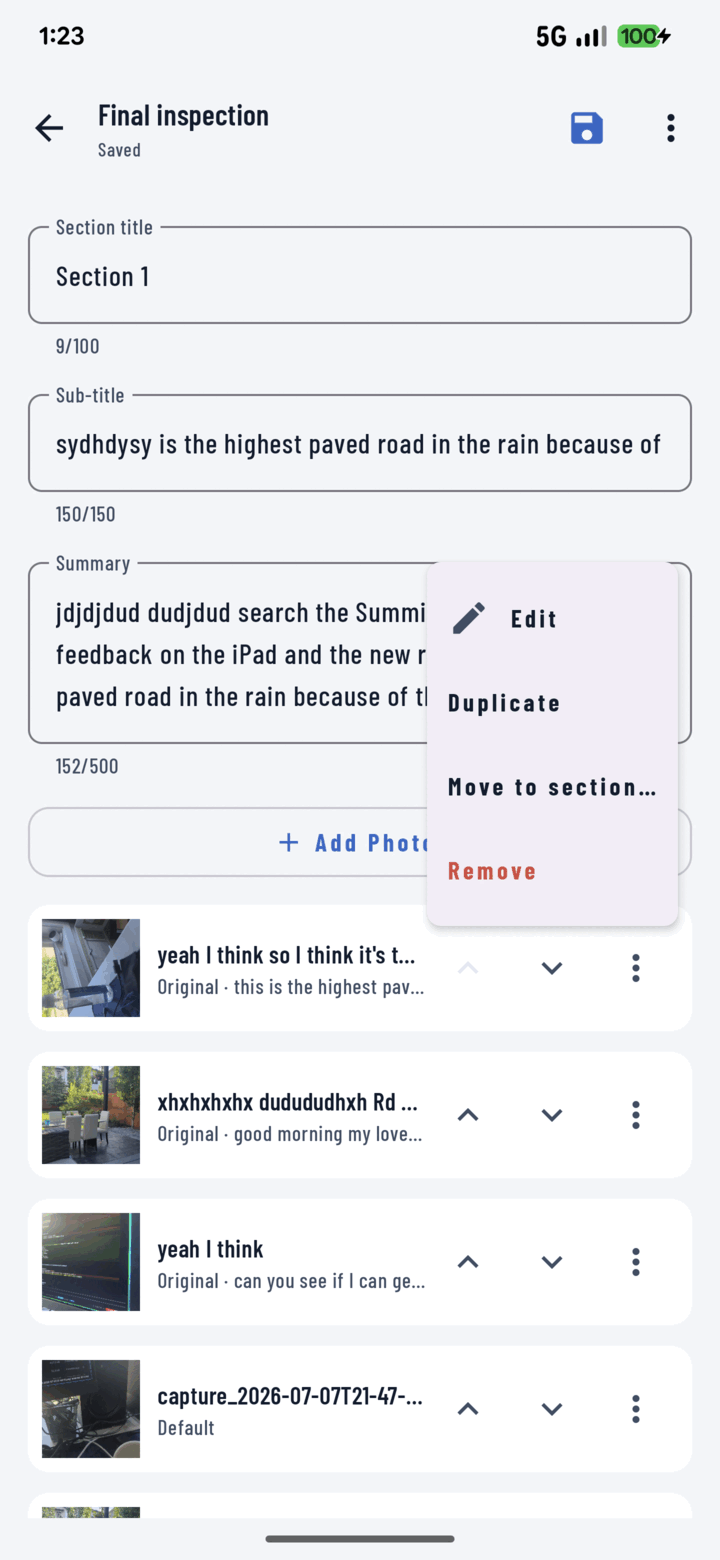
Tap a photo's menu and choose Move to section to shift it into a different report section.
The Photo Overflow Menu — All Options
| Option | What it does |
|---|---|
| Edit | Override this photo's title, description, and display mode (Original / Annotation / Both) for this report |
| Duplicate | Place the same photo twice — e.g. once in "Before/After", once in "Punch List" |
| Move to Section | Transfer it to another section |
| Remove | Take it out of the report (the photo stays in the project library) |
Within a section, photos also reorder — arrange the sequence the PDF will print.