
Where
Open the report in the editor and select the Cover tab.
Every Cover Setting Explained
| Setting | What it does |
|---|---|
| Title | The report's headline ("Week 12 Progress — Oak Street Remodel"). Character counter keeps it cover-sized. |
| Subtitle | Secondary line under the title — date range, phase, or client name. Also counter-limited. |
| Include cover page | Master switch — off produces a report that starts straight at the first section (useful for internal quick reports). |
| Company logo | Shows your company logo at the top of the cover (how the logo gets there). |
| Company name | Prints the company name — useful alongside or instead of the logo. |
| Title / Reporter / Date toggles | Individually show or hide the title block, the name of whoever generated the report, and the report date. |
| Total photo count | Prints how many photos the report contains — clients and adjusters like the at-a-glance scope figure. |
Recommended Setups
- Client progress report: everything on — logo, company name, title, reporter, date, photo count. Professional and accountable.
- Internal punch-list run: cover page off entirely — straight to the photos.
- Insurance package: photo count and date prominently on — scope and timing are what adjusters check first.
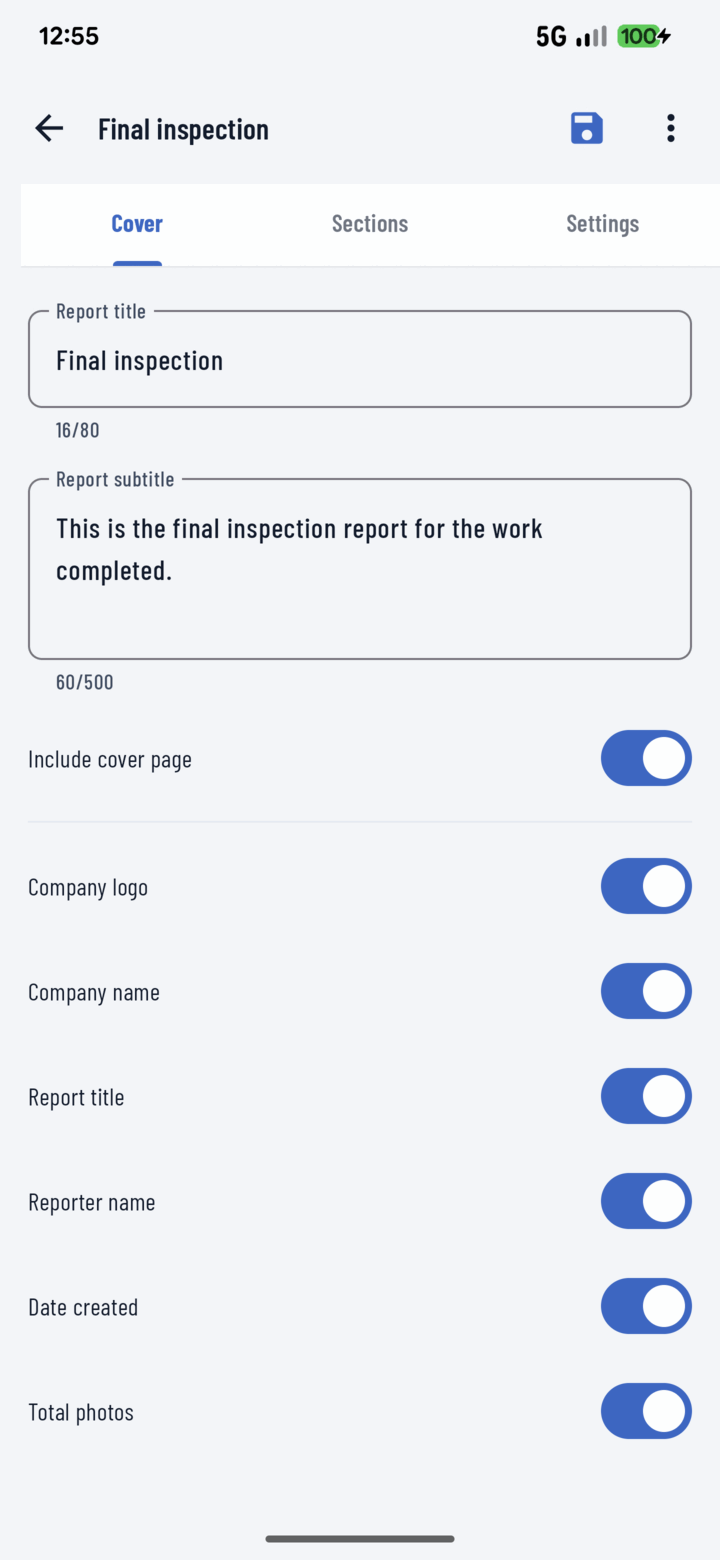
The Cover tab sets the title and subtitle and toggles which details appear on the cover page.