
Steps
- Open the report in the editor and select the Settings tab.
- Find Photos per page and choose 2, 3, or 4.
- Generate the PDF — every photo page uses the chosen layout.
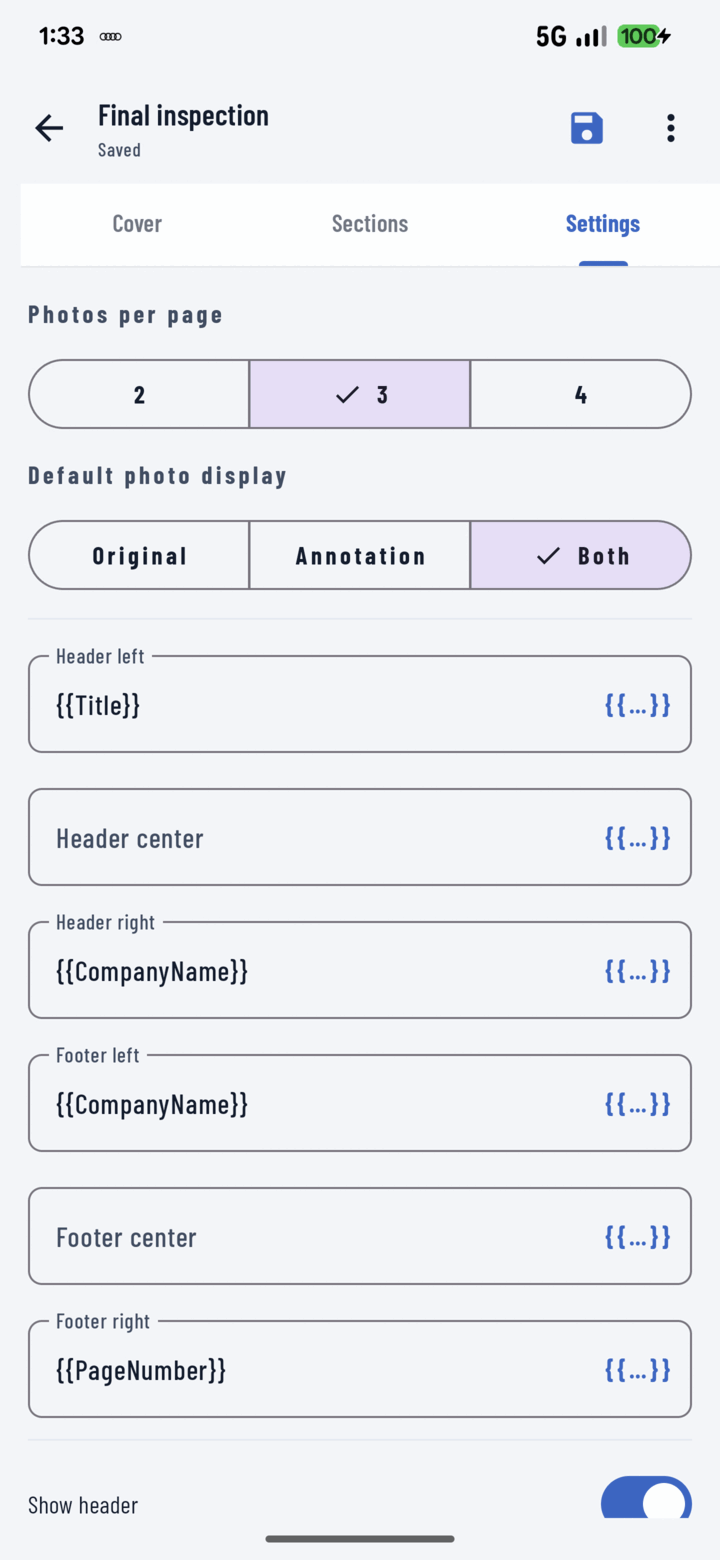
Set how densely photos lay out with the Photos per page option on the Settings tab.
Which to Pick
| Setting | Best for |
|---|---|
| 2 per page | Detail matters: damage documentation, insurance claims, close-up defect photos — each image prints large |
| 3 per page | The balanced default for progress reports |
| 4 per page | High-volume overviews: weekly recaps with dozens of photos, keeping page count (and file size) down |
Notes
- The setting is per-report, so your "insurance" template can run 2-up while your "weekly" template runs 4-up (templates).
- Pair with photo numbers, dates, and GPS toggles in the same Settings tab — dense pages benefit from the metadata labels.