
Set the Report Default
- Open the report in the editor → Settings tab.
- Find Photo display and choose:
• Original — clean photos, no markup
• Annotation — photos with their markups rendered
• Both — each photo appears twice, original and annotated - Every photo in the report uses this unless individually overridden.
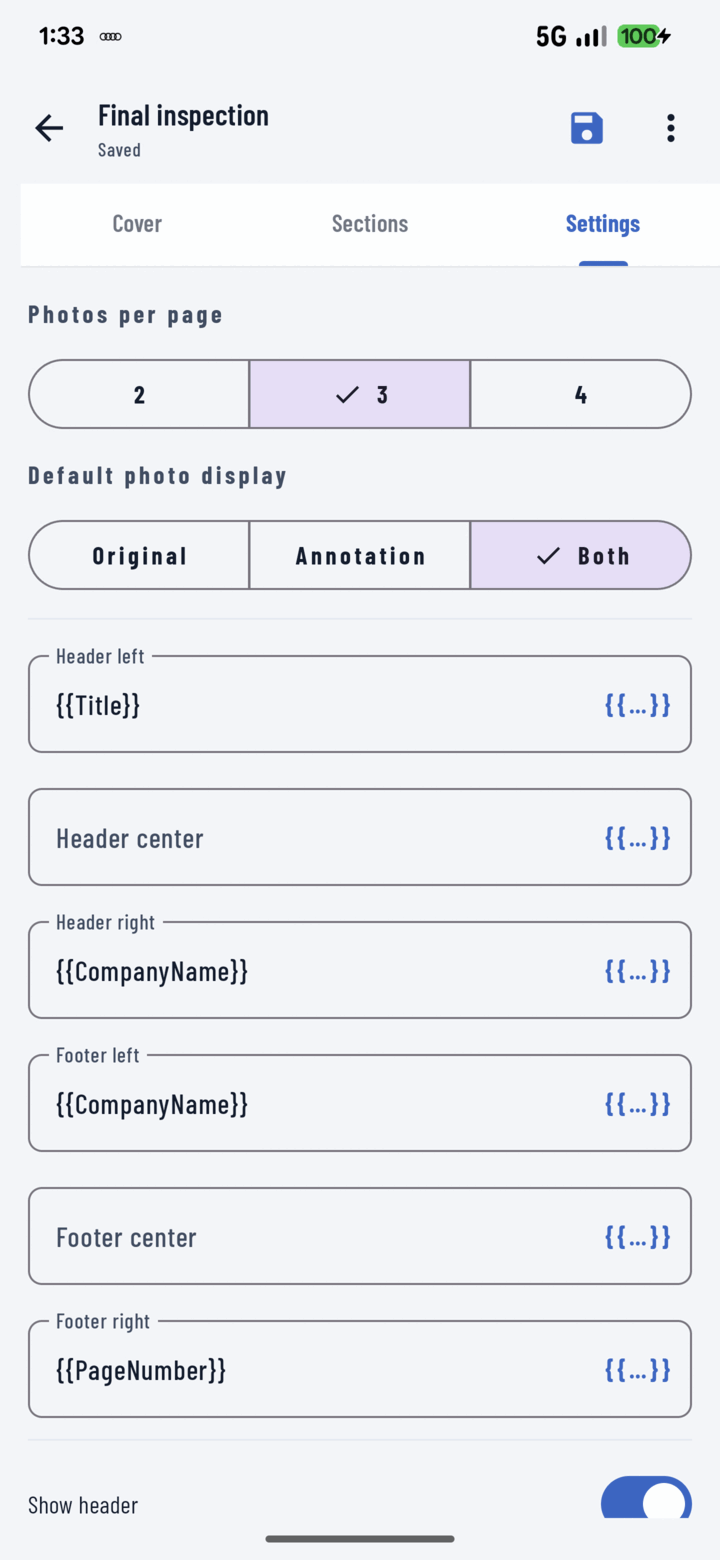
The Settings tab's Default photo display controls whether photos print Original, Annotation, or Both.
Override a Single Photo
- Sections tab → open the section → find the photo.
- Overflow menu → Edit.
- Set that photo's own display mode (plus optional title/description overrides).
When to Use Which
| Mode | Use case |
|---|---|
| Original | Marketing-quality progress reports — clean visuals |
| Annotation | Punch lists and defect reports — the circles and arrows are the content |
| Both | Insurance and dispute documentation — the untouched evidence next to the callout, no ambiguity |
Only photos that have annotations are affected by the mode — clean photos print clean regardless.