
Steps
1. Open Report Settings
In the report editor, click Report Settings at the bottom of the section sidebar.
2. Pick a layout
Under Photos per page, choose one of the three radio options:
- 2 per page — largest photos, best for detail shots and defect documentation.
- 3 per page — balanced layout for general progress reports.
- 4 per page — most compact, best for high-volume photo dumps and overview reports.
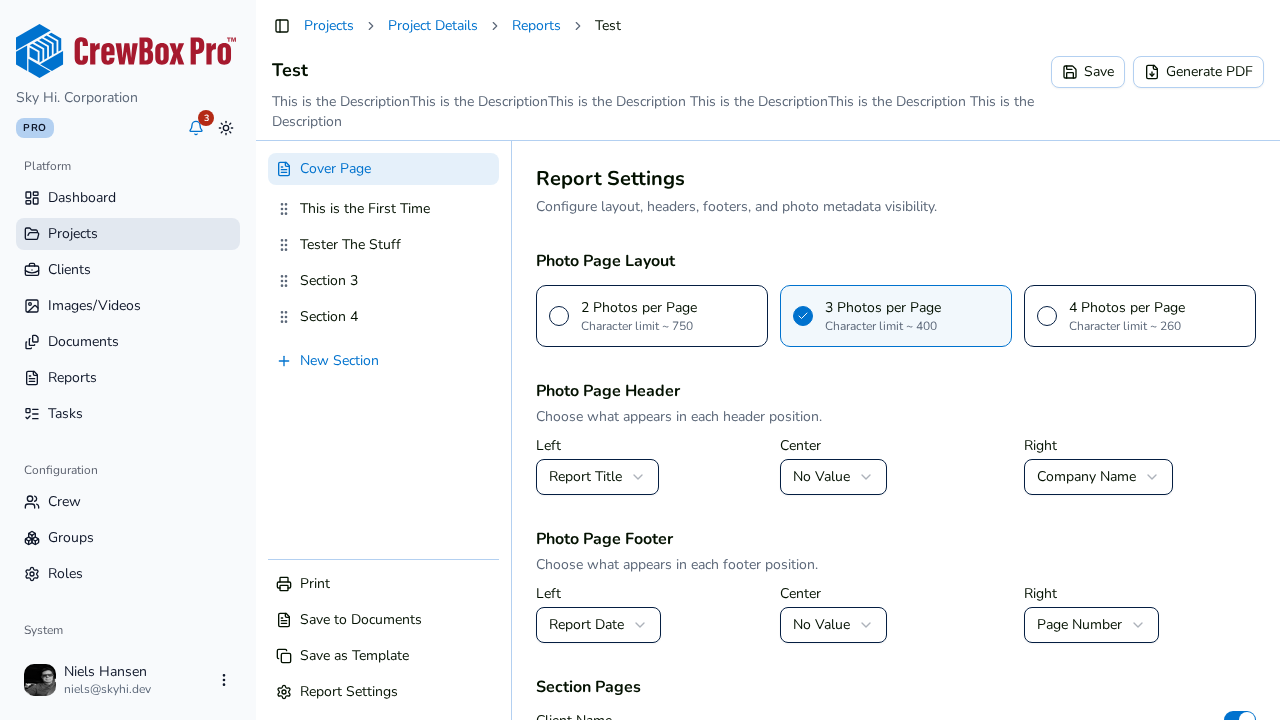
Each radio card states the description character budget that comes with it, so you can see the trade-off before committing.
3. Understand the caption trade-off
Per-photo description budgets shrink as density rises:
| Layout | Description budget |
|---|---|
| 2 per page | ~750 characters |
| 3 per page | ~400 characters |
| 4 per page | ~260 characters |
New reports default to 2 per page.
4. Check the preview
On large screens the live preview re-renders after the change, showing the new pagination. Photo pages are chunked by this setting, and photo numbering runs continuously across the whole report regardless of layout.
Tips
- Decide the layout before writing long descriptions — switching to a denser layout reduces the room available for each caption.
- The setting is part of the report's settings, so it's captured by Save as Template and applied to every report built from that template.