
Steps
1. Open Report Settings
In the report editor, click Report Settings at the bottom of the section sidebar.
2. Set the photo metadata toggles
The show/hide options control what prints with each photo:
- Photo Numbers — sequential numbers that run continuously across the whole report, so "Photo 14" means the same thing in every section.
- Photo Captured By — the crew member who took the photo.
- Photo Date Captured — when the photo was taken.
- Photo GPS — the capture coordinates, useful for proving where documentation happened.
- Photo Tags — the photo's tags, printed as color-coded pills matching the same tag colors you see in the app.
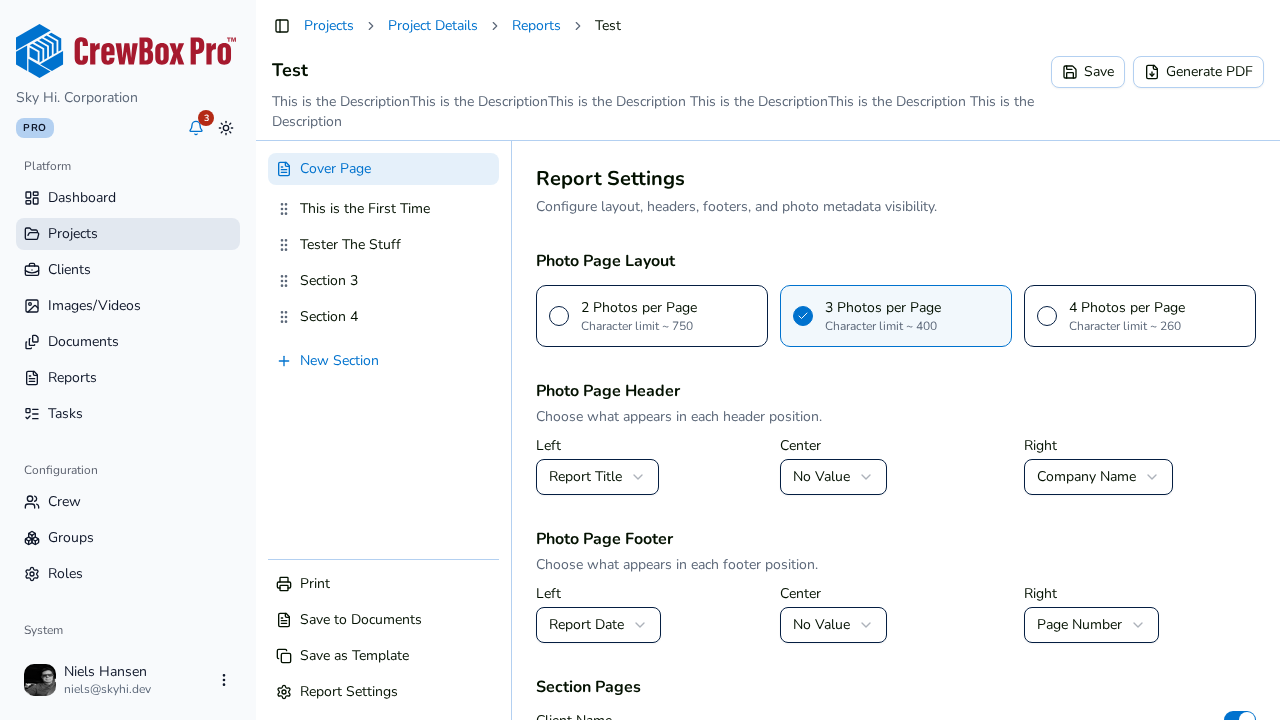
3. Set the page-structure toggles
The same settings panel also controls larger structural elements:
- Include Cover Page — turn the cover page on or off entirely.
- Section Title Pages — give each section its own title page (its content is governed by the section-pages toggles: Client Name, Project Name, Photo Date).
- Show Header / Show Footer — the running bars on every page.
4. Confirm in the preview
Changes autosave, and on large screens the live preview re-renders so you can see metadata appear or disappear under the photos before generating the PDF.
Tips
- For client-facing reports, many teams hide GPS and tags but keep photo numbers, captured-by, and date — the numbers make phone conversations easy ("look at photo 23").
- These toggles are part of the report's settings, so Save as Template captures them for reuse.