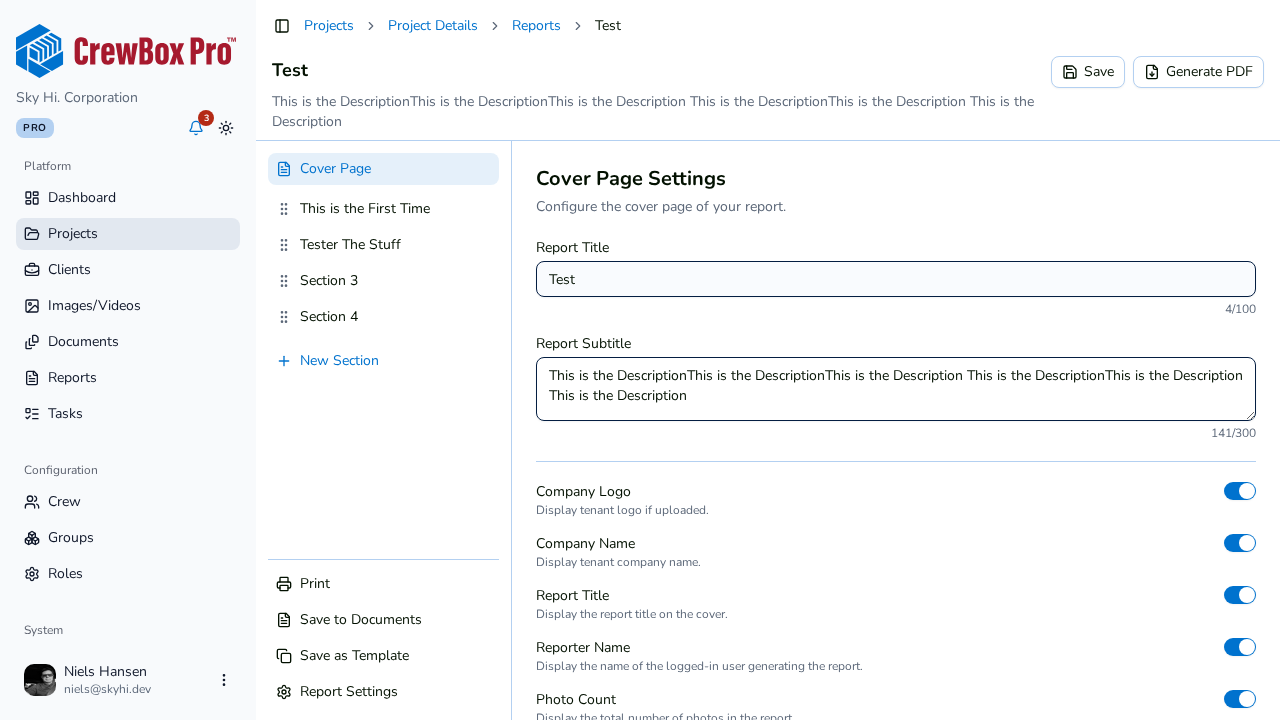
Steps
1. Make sure a logo is on file
The report pulls the logo from your company profile — it isn't uploaded per report. The workspace owner uploads the company logo in their Account settings. If your reports show no logo with the toggle on, this is the first thing to check.
2. Open the report's cover editor
Open your project, click the Reports tab, open (or create) a report, then click Cover Page at the top of the section sidebar.
3. Enable the Company Logo toggle
Turn on the Company Logo toggle in the cover element list. While you're there, you can also enable Company Name to print the name as text alongside the logo.
4. Check the result
On large screens the live preview re-renders automatically, so you'll see the logo appear on the cover within a moment. On smaller screens, click Generate PDF to download and inspect the result.
How it works
When the PDF renders, CrewBox fetches your company profile (logo and company name) client-side and places the logo on the cover page. Because the logo lives in one place:
- Updating the logo in the owner's Account settings updates every future PDF render — no need to touch individual reports.
- Templates saved with Company Logo enabled will brand every report created from them automatically.