
Steps
1. Open the cover editor
In the report editor, click Cover Page at the top of the section sidebar.
2. Write the title and subtitle
- Title — up to 100 characters, with a live counter under the field.
- Subtitle — up to 300 characters, also with a counter.
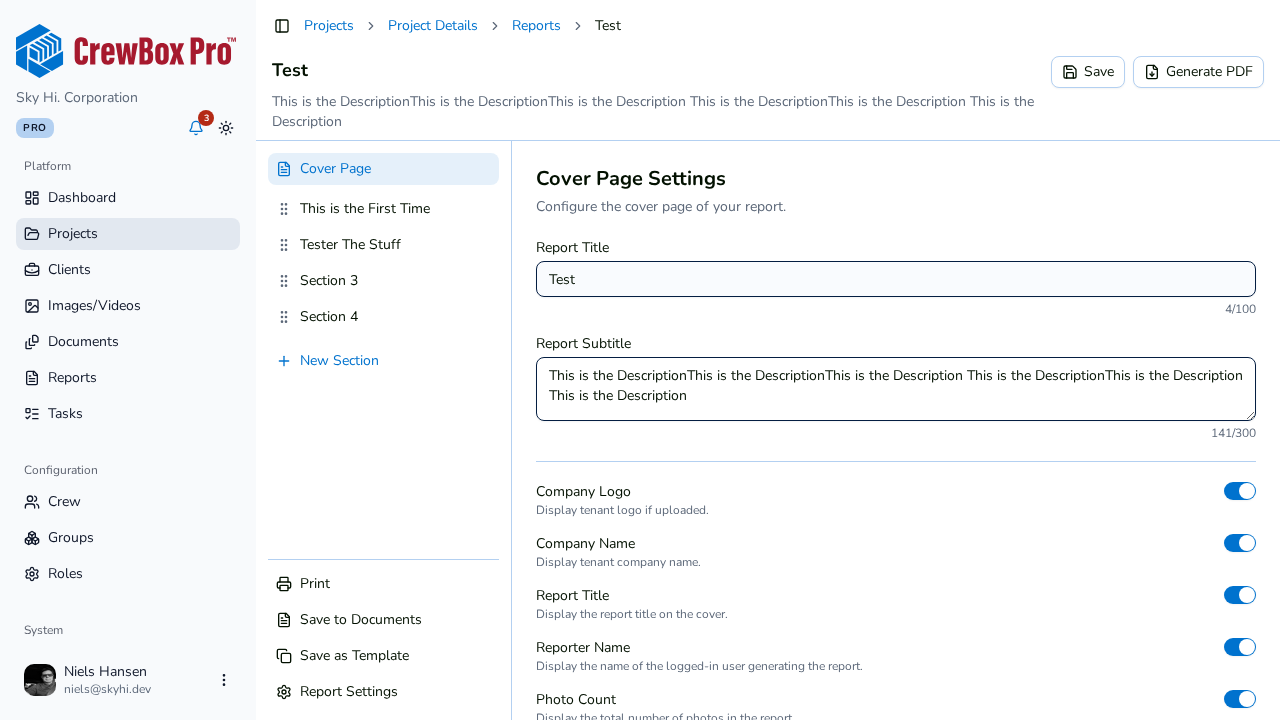
Use the subtitle for context the title can't hold: reporting period, site address, or a one-line status summary.
3. Toggle the cover elements
Six toggles control what renders on the cover:
- Company Logo — your company logo (uploaded by the workspace owner in Account settings).
- Company Name — your company's name as text.
- Report Title — the title you entered above.
- Reporter Name — who created the report.
- Photo Count — the total number of photos in the report.
- Date Created — when the report was created.
Flip any of these and the live preview (on large screens) re-renders so you can see the cover change immediately.
4. Decide whether to include the cover at all
The cover page itself can be switched off: open Report Settings and use the Include Cover Page toggle under the show/hide options. Everything autosaves as you go.
Tips
- A minimal cover (logo, title, date) often reads more professionally than one with every element on.
- The cover settings are captured when you Save as Template, so a well-tuned cover only needs to be built once.