
Steps
1. Open the section
In the report editor, click the section containing the photo. Each photo appears as a row with a thumbnail and its caption fields.
2. Edit the title
Type in the photo's title field — up to 50 characters. This is an override that exists only inside the report; the photo's filename and details in the media library are unchanged.
3. Write the description
Type in the description field. This is where the narrative goes: what the photo shows, why it matters, what happens next. Like the title, it's a report-only override.
4. Watch the character budget
The description limit isn't fixed — it scales with the report's photos per page setting, because more photos per page means less room under each one:
- 2 per page — roughly 750 characters per description.
- 3 per page — roughly 400 characters.
- 4 per page — roughly 260 characters.
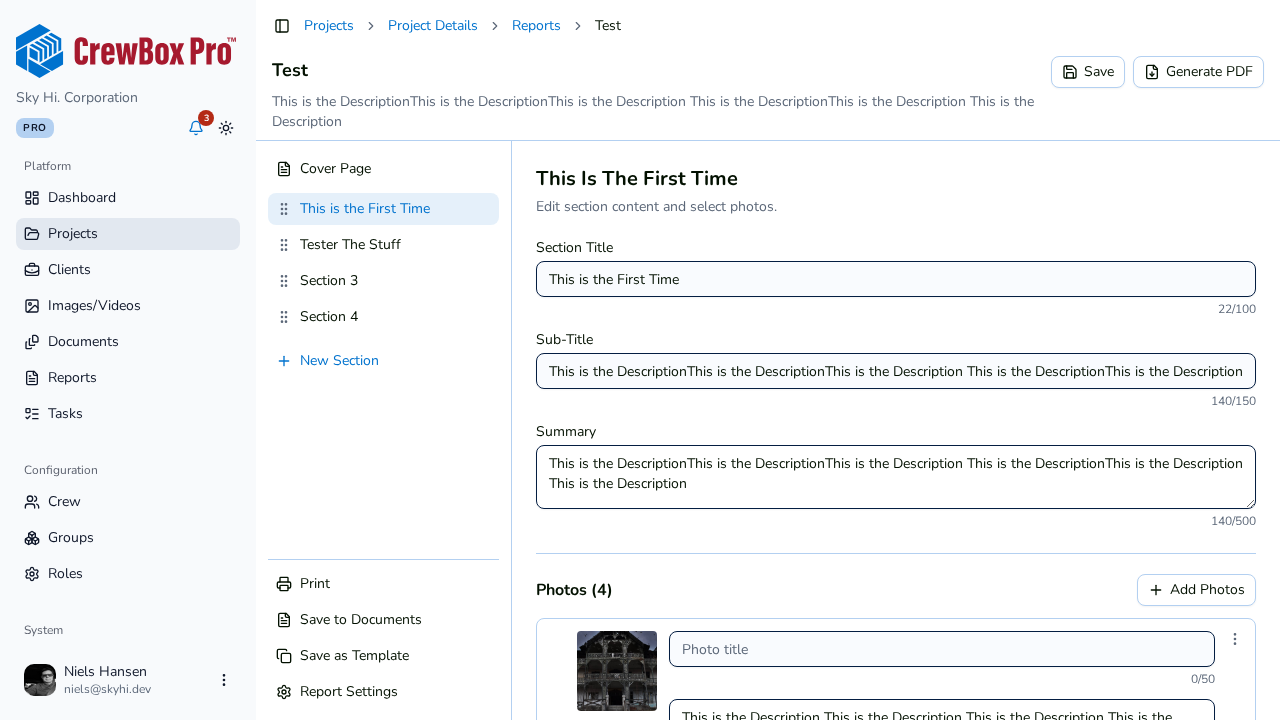
The overall budget is divided by the photos-per-page value, with a minimum of 150 characters. If you switch the layout in Report Settings, the available budget changes accordingly, so write long descriptions with the final layout in mind.
Tips
- Fields commit their value when you click away, and the report autosaves — no manual save needed.
- Pair captions with the metadata toggles (photo numbers, capture date, GPS, tags) in Report Settings; let metadata carry the facts so your caption can carry the story.