Steps
1. Open the report
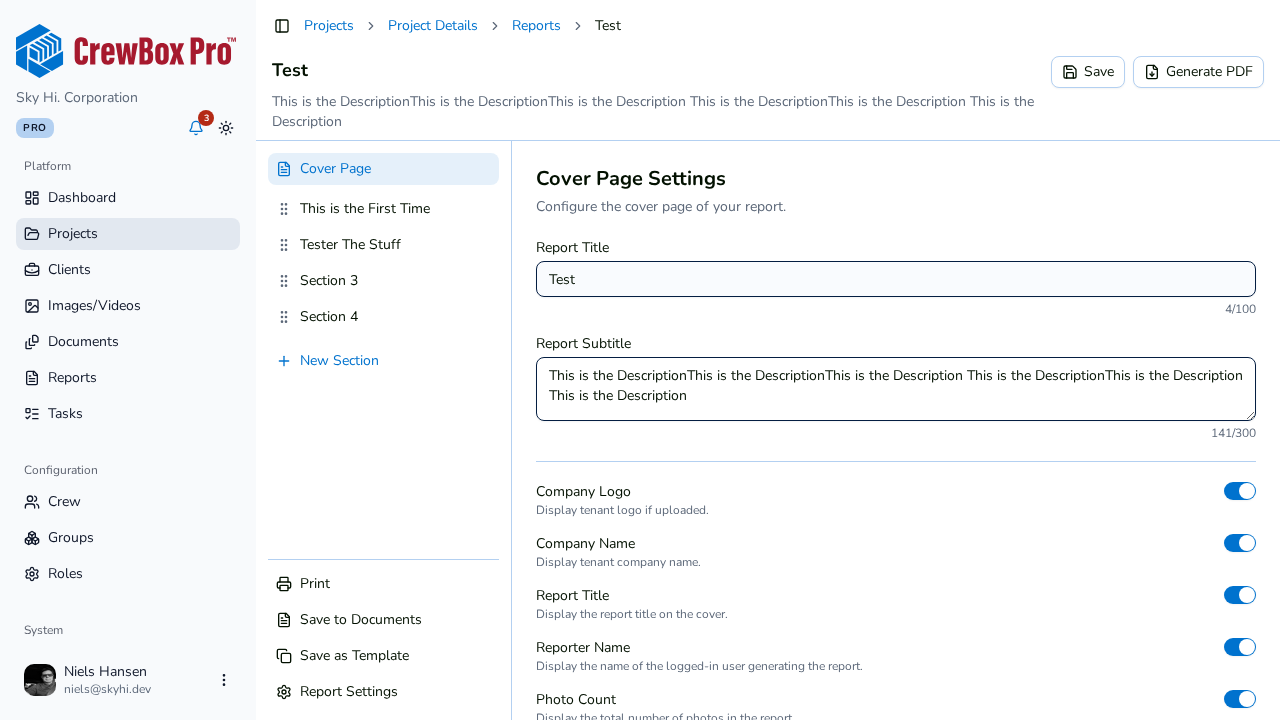
Open your project's Reports tab and click Open on the report. The section sidebar on the left lists Cover Page at the top, followed by every section in its current order.
2. Drag sections into order
Click and hold a section in the sidebar, then drag it up or down to its new position and drop it. The order in the sidebar is the order sections appear in the generated PDF. On large screens, the live preview re-renders shortly after you drop, so you can confirm the new flow immediately.
3. Delete a section you no longer need
Hover over a section row in the sidebar and click the delete control that appears. This removes the section along with its photo list from the report.
4. Let autosave do the rest
Reordering and deleting are saved automatically like every other edit — the "Saving…" indicator shows when the change is being written, and you can click Save to flush immediately.
Tips
- The Cover Page entry is fixed at the top — it isn't part of the draggable section list.
- If you want to move individual photos rather than whole sections, use the photo row menu's Move to Section instead of restructuring sections.
- Deleting a section removes its photo entries from the report only — the underlying photos stay untouched in the project's media library.