
Steps
1. Start the report
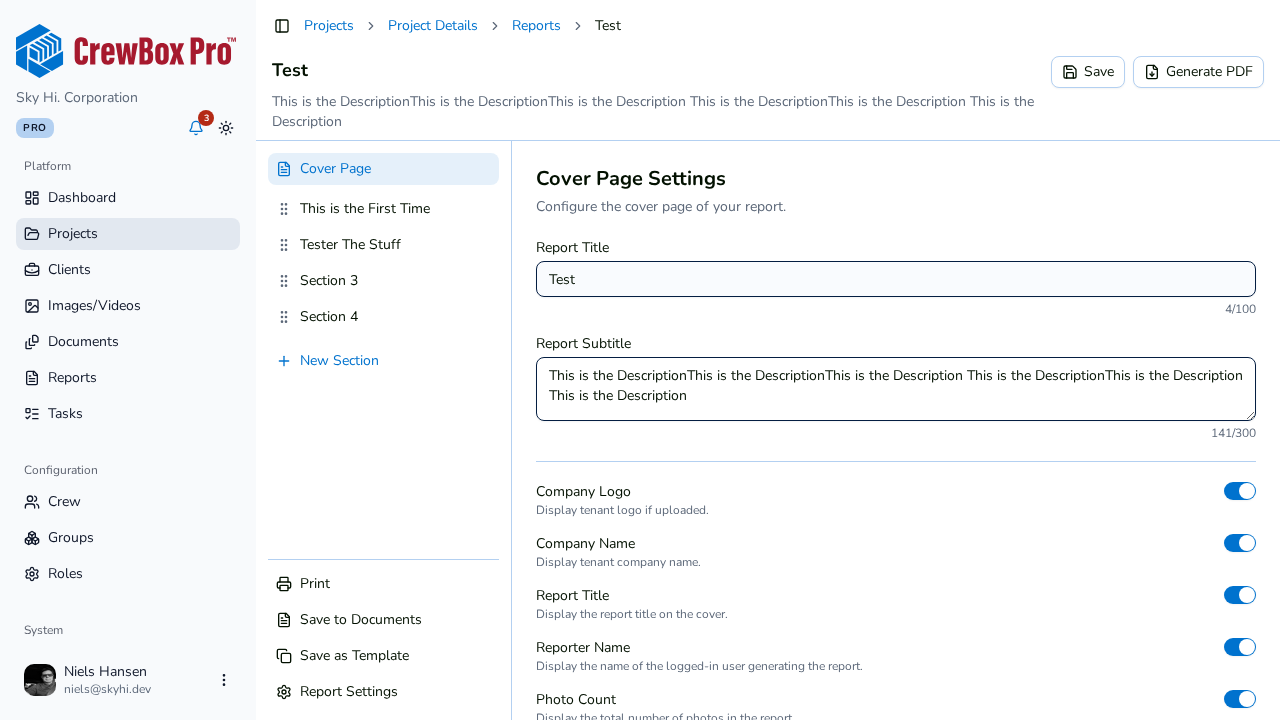
Open your project and click the Reports tab. Click New Report to start from scratch (it opens as "Untitled Report"), or Load Template to start from a saved template. The report editor opens with a section sidebar, an editing pane, and — on large screens — a live PDF preview.
2. Set up the cover page
Click Cover Page in the sidebar. Enter a Title and Subtitle (both have live character counters), then toggle the cover elements you want: Company Logo, Company Name, Report Title, Reporter Name, Photo Count, and Date Created.
3. Add sections and photos
Click New Section in the sidebar. Give the section a title, sub-title, and summary — each field has a character limit and counter, and commits when you click away. Then click Add Photos to open a searchable multi-select picker over the project's media. Drag photos to reorder them, and give each one an optional title and description override.
4. Tune the settings
Open Report Settings from the bottom of the sidebar:
- Photos per page — 2, 3, or 4 (each option states its description character budget).
- Header & footer — three positions each; set each to No Value, a token like
{{Title}}or{{PageNumber}}, or free text. - Section pages — toggles for Client Name, Project Name, Photo Date, plus the default photo display (Original / Annotated / Both).
- Show/hide toggles — cover page, section title pages, header, footer, photo numbers, captured-by, date captured, GPS, and tags.
5. Generate the PDF
When the report looks right (check the live preview), pick an output from the editor:
- Generate PDF (in the header) — renders and downloads the PDF.
- Print (sidebar bottom) — opens the generated PDF in the browser print dialog.
- Save to Documents (sidebar bottom) — files the PDF into the project's documents, tagged "Report".
Autosave
You don't need to babysit the Save button — every change autosaves after a short pause, a "Saving…" indicator shows progress, and pending edits are flushed when you leave the editor. Save is there when you want to force it immediately.